


DIY: Washi Tape Guest Book
If you’re looking for an alternative guest book idea that’s still somewhat traditional, we’ve got you covered. Choose any beautiful guest book, like this Handsome Velvet Guestbook from BHLDN, but jazz it up by providing your guests with decorative paper and washi tape. You can cut the paper to all different sizes and use fancy scissors for a pretty edge. Provide directions if you think your guests will be confused, and in the end you’ll have a creative little guest book and messages that can be moved around or alternately placed in a wedding album at a later date.


Additional Information
This little DIY project compliments of by emily b. event design!
February 29, 2012 | link | More: Do it Yourself
DIY: Giant Paper Flowers
A few weeks ago, we fell in love with this spectacular DIY wedding on Green Wedding Shoes. The paper flowers are totally amazing, and lucky us, they quickly posted a step-by-step DIY guide to giant paper roses!

They’re sort of magical, don’t you think?
Additional Information
Above image by Studio Castillero.
January 31, 2012 | link | More: Do it Yourself
DIY: Terrarium Escort Cards from Wednesday Inc.
Don’t miss these adorable DIY terrariums from Wednesday Inc. They’re totally elegant, unique, and double as both favors and escort cards. We love this idea…

Get the full details for this adorable project over at Wednesday Inc’s blog.
Additional Information
Follow Wednesday Inc. on Facebook for more inspiration and fun projects!
January 10, 2012 | link | More: Do it Yourself
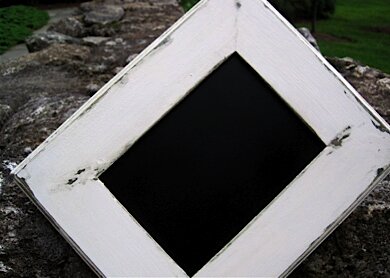
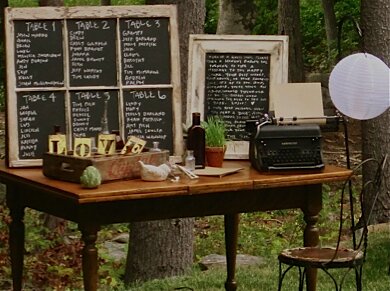
DIY: Shabby Chic Wedding Chalkboards
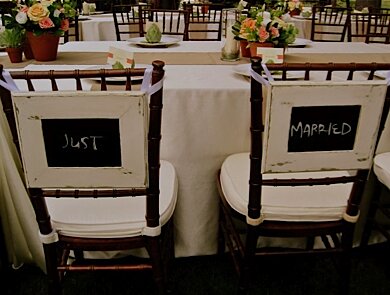
Finished all the major planning and looking for fun do-it-yourself décor ideas? In the end, it’s the little details that will really wow your guests. These custom chalkboards can be made in a variety of sizes and used in a variety of ways. Consider them for table numbers or as props in your photos. The best part? They’re easy to make ...
1. Frame: Purchase a plain wood frame in your desired size from a local craft store, or better yet, upcycle something you already have.
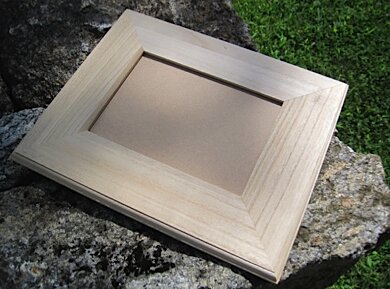
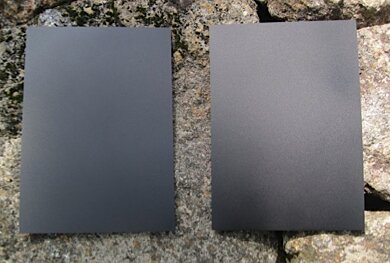
2. Chalkboards: Remove the glass from the frame and spray with a chalkboard paint. We’ve had good luck with the Krylon brand. Be sure to follow the directions so you get a nice even surface.
3. Let stand: For best results, let the paint dry for 24 hours.
4. Paint frames: While the chalkboards are drying, paint your frames. To achieve the shabby chic, distressed look, choose two colors. One will be your base color, which will show through once you’ve distressed the frame, and the other will be your all-over color. In this case, we chose to paint the frames green first and then cover the green with a rich, creamy white. For best results, we suggest letting this paint dry thoroughly before the next step.
5. Distress frames: Once your top coat of paint is thoroughly dry you will want to move into the sanding stage. You can use a fine grain sand paper for this step or you can speed things up with an electric sander or a sanding wheel attachment for your drill. Stick to the corners and raised areas to achieve an authentic, distressed look.
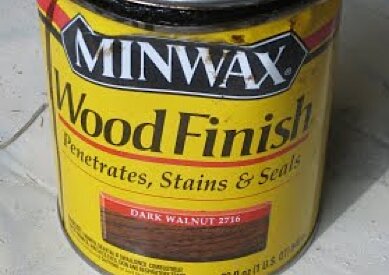
6. Stain: Once you’ve distressed the frame to your liking, choose a stain color. We prefer a dark walnut but it depends upon the antiqued look that your trying to achieve. Using a rag, rub the stain all over the frame, filling all cracks, spaces, and irregularities in the wood. Don’t be afraid to do this more than once, rubbing it into the distressed areas, as it will enhance the aged look.
7. Reassemble: Once the stain has dried, you can gently place the chalkboard coated glass back into the frame, being careful not to scratch the surface.
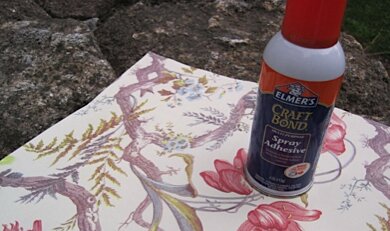
8. Finishing touch: Choose a nice paper and cut it to the size of the frame. Using Elmers Craft Bond (a magical product), adhere the paper to the back of the frame. This will give your shabby-chic custom chalkboards a truly finished and professional look!
And don’t stop there. Consider all the different ways that chalkboards can play a roll in your décor…
Additional Information
Want this look but don’t want to DIY? Try Etsy!
Posh Pilfer & Shabby Chalks have tons of fun, handcrafted chalkboards.
August 25, 2010 | link | More: Do it Yourself
Do it Yourself: The Mustache Craze
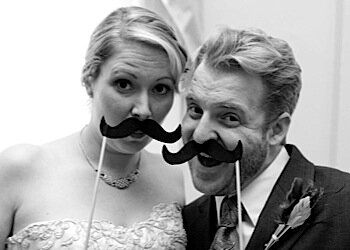
The mustache craze has made its way to a wedding near you, of this I am sure. It isn’t for everyone but for the not-so-serious couple, it is a fun wedding favor that will encourage your guests to loosen up and get silly in front of the camera. Here are some wedding mustache resources and a couple do-it-yourself guides for a fun pre-wedding activity with an amazing outcome. And of course, no one can deny the great photographic memories you will be left with ...
DIY:
- Even Martha Stewart does the mustache on a stick.
-
Designer Lisa Welge has her own mustache techniques.
-
Wedding Mustache Resources:
- Michelle at A Wedding Sketchbook asks ‘Fake Moustaches, Are They Hair to Stay?’
- Something’s Hiding in Here shows off a couple mustache weddings.
- Have your pick of mustache type when you purchase them at MaroDesigns.
Additional Information
Katie and Michael were photographed here by Liesl Clark of Claris Photography.
Watch for their story coming to www.Elegala.com’s Real Weddings soon!
April 7, 2010 | link | More: Do it Yourself
Sections
![]()