


Inspiration Board: Perfect Time for Pastels
It’s official; spring is here! And we’re celebrating with pretty pastels. These sweet shades are back in a big way, so don’t be afraid to soften your wedding color scheme with some spring-inspired pastels sprinkled throughout the décor.
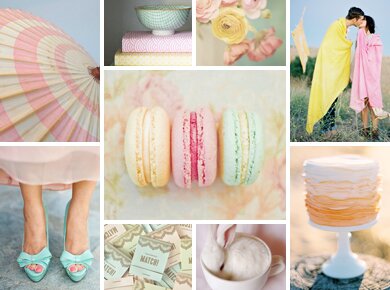
Top Row:
Pink striped umbrella via Plum Pretty Sugar Tumblr
Patterned bowl from Anthropologie
Pretty ranunculus blooms via Indulgy
Gorgeous engagement shoot by Jose Villa
Middle Image:
Pretty macaroons via vi.sualize.us
Bottle Row:
Turquoise wedding shoes photographed by Corbin Gurkin
Pastel matchbook invitations made by Twig & Thistle
Bunny in a teacup via BSC Design
Ruffled peach wedding cake by Eat Cake!
Additional Information
For other pretty photographs and lovely wedding inspiration, follow us on Pinterest!
March 26, 2014 | link | More: Inspiration Boards
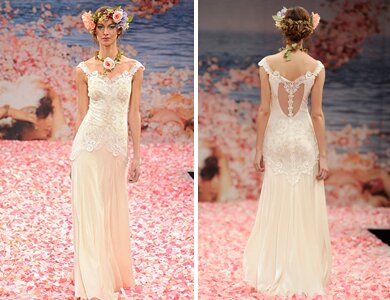
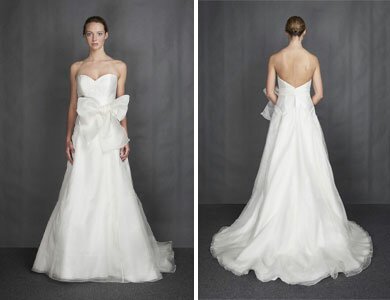
Gown of the Week: Claire Pettibone’s Thalia
With the Game of Thrones season three premiere coming up this Sunday, we’ve got romance and fantasy on the brain. From their wildly dramatic settings and stunning costumes, we happen to think this the Thalia gown would be a perfect fit in Westeros. A central piece in Pettibone’s An Earthly Paradise collection, this ethereal gown’s silhouette is punctuated by the ivory embroidered bodice with guipure lace appliqués and the flowing silk velvet skirt.
Additional Information
For more of our favorite gowns, follow our Wedding Gown Pinterest Board!
March 24, 2014 | link | More: Wedding Wardrobe
Inspiration Board: Olive, Coral & Pear
Think outside the traditional color palette when planning a late fall wedding. Unexpected hues paired with details that speak to the season will make for memorable wedding décor. We can’t help but swoon over this peachy-coral paired with deeper olive tones and a punchy golden yellow. Intersperse some sparkle with those traditional fall hues, and you’ve got a unique wedding color scheme that still speaks to the season.

Top Row:
Vintage peach earrings via Not One Sparrow
Bosc Pear via Flickr
Bistro lights via Style Me Pretty
Middle Row:
Dessert photographed by Thayer Photo
London & Big Ben via We Heart It
Girl in gold jacket via Pinterest
Flowers by Amy Merrick
Bottom Row:
Stack of books via Postcards and Pretties
Tablescape photographed by Jonathan Ong
Bow-Topped Slingbacks from BHLDN
Additional Information
For other pretty photographs and lovely wedding inspiration, follow us on Pinterest!
November 12, 2013 | link | More: Inspiration Boards
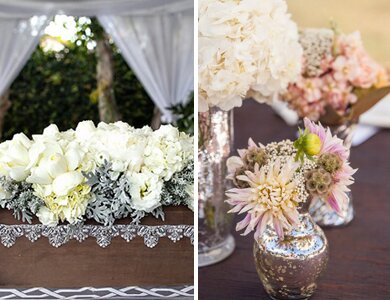
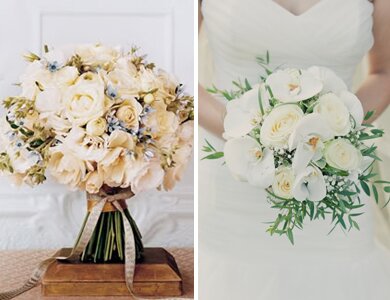
This Week on Pinterest: Winter Wedding Flower Trends
Winter weddings are on the rise, and why not? It’s a completely romantic and unique time of year to tie the knot. We chatted with Morgan Perrone of Valley Flower Company and got her take on top winter wedding flower trends for the upcoming season. She says, “I rely a lot on instinct rather than too much planning. I’ve found that if you overly plan something, it usually ends up missing some of its charm.” This is great advice, especially for winter brides when the planning can be more difficult and the “winter wonderland” theme may end up feeling cliché. Here are some of the unique ideas we collected based on Perrone’s suggestions…
1. Metallics: We’re definitely not over that trend yet. Silver, gold, bronze, incorporate them all! (Photo credit: Left | Right)
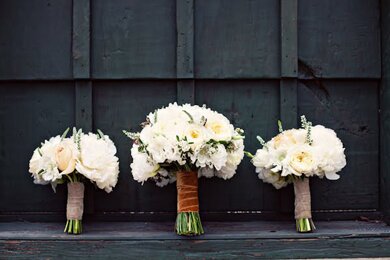
2. Traditional: If you’re attracted to a traditional shape with elegant greenery, go for it. “Classic” never goes out of style. (Photo credit: Left | Right)
3. Velvet: Velvet bouquet wraps, velvet ribbon on top of table runners, velvet bows – any way you use it, it just screams elegance. (Photo credit)
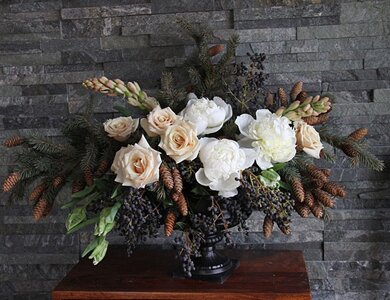
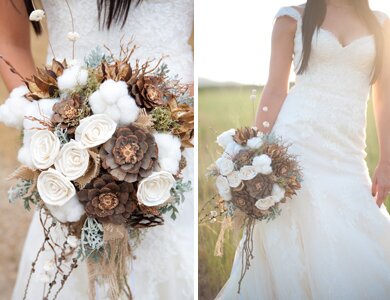
4. Pine Cones: ...can be cool and not cliché when combined with the right soft blooms in that perfect container. (Photo credit)
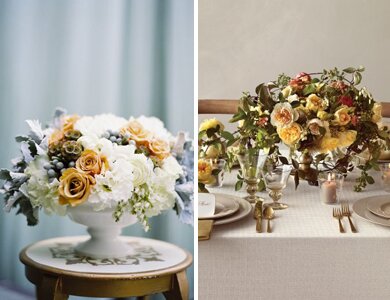
5. Muted Golden Tones: Creamy ivory, beige, and yellow hues are a lovely touch of warmth in the chilly months. (Photo credit: Left | Right)
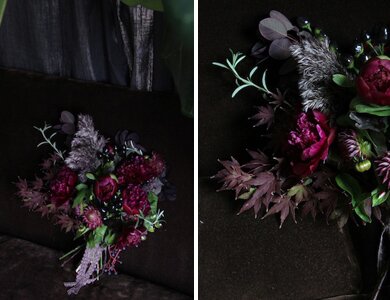
6. Moody Maroons: Deep, dark burgundy, plums, and reds will always make the right statement in the winter months. (Photo credit)
7. Unexpected Texture: Think outside the box and combine flowers with other materials, like wood, cotton, or burlap. (Photo credit)
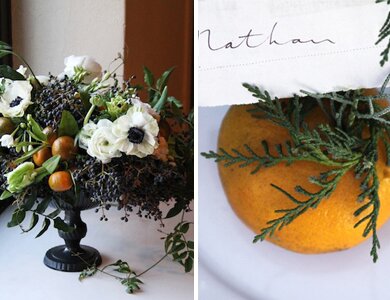
8. Privet Berry and Pine: The deep plum of the privet is a lovely choice color-wise, while the pine needs to be used carefully so as not to feel cliché, like here where it sits atop citrus. (Photo credit)
Additional Information
For other pretty floral design, follow us our wedding bouquet and wedding flower boards on Pinterest!
November 1, 2013 | link | More: Things We Love
Gown of the Week: Heather Lee by Heidi Elnora
A giant bow? Yes, please! Heidi Elnora has wooed us with this elegant silhouette fit for a princess. The Heather Lee wedding gown is 100-percent silk organza and silk dupioni with a structured bodice, organza skirt, chapel train, and a big, gorgeous, giant bow, which we really love.
Additional Information
Want more? Follow our Wedding Gowns Pinterest board!
September 25, 2013 | link | More: Wedding Wardrobe
Sections
![]()